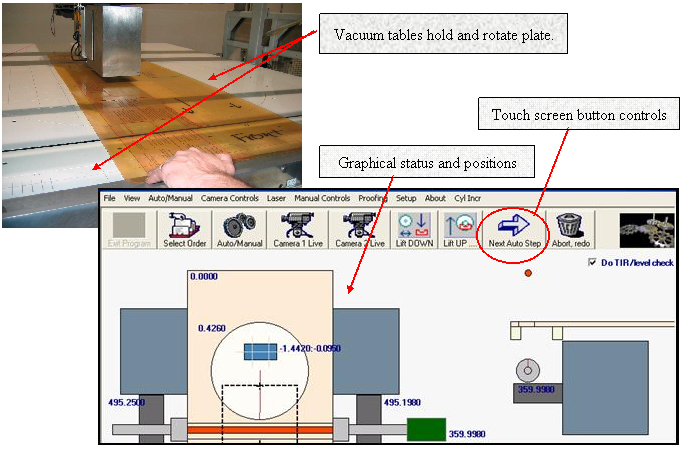
Automated Hands-Free MountingStep 1 – Lay printing plate on vacuum table: Roughly locate plate front and center on mounter table and touch “Next Auto Step.” Accurate placement is not important; as the mounter will accurately straighten and mount.
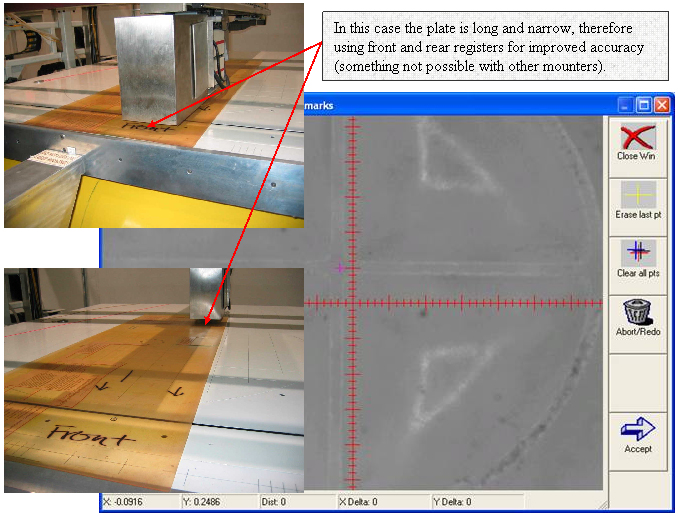
Step 2 – Touch Registers: Camera automatically moves near each register and operator verifies by touching register center (magenta + where touched). Because the camera can moves automatically in both the X and Y direction, registers may be located anywhere (by angle) on the plate.
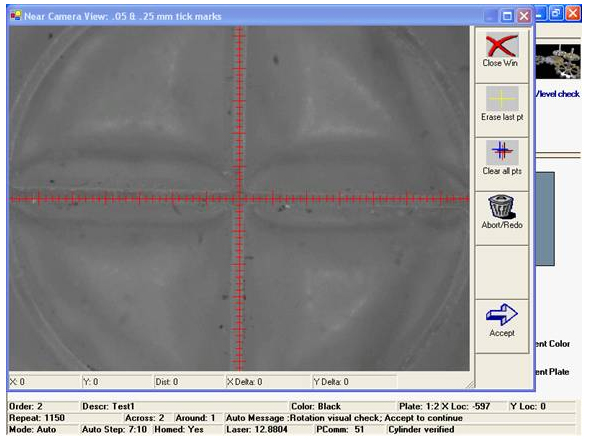
Step 3 – Plate automatically straightened; touch “Accept” button: The printing plate is automatically rotated (oriented straight) and vision system verifies rotation to the operator, measuring to within +/-.0002” of reg. center.
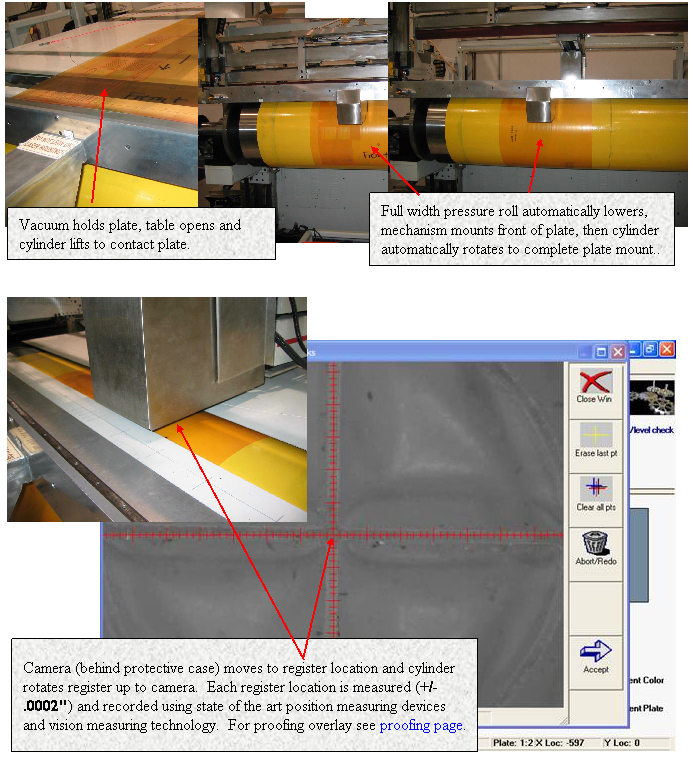
Step 4 – Initiate automatic mount and proof sequence with touch screen button: Printing plate is automatically mounted using pressure roll for even, bubble free mount. The vision system then verifies the mounted register location and records it in the database where it may be examined at anytime on any networked computer.
|